
Instagram: How I Edit My Pictures
One of the most common questions I get on Instagram (and sometimes in person) is 'what filter do you use for your Instagram pictures?'
Well if you haven't seen my ad hoc Instastory editing tutorials then this answer might come as a surprise.
It's: none.
Yup, I don't use a filter on my Instagram pictures. Instead I've found the best way to achieve my crisp, white Instagram theme is through a combination of using an app called Facetune and the good ole' editing tools integrated in Instagram.

So let's talk a little bit more about the app Facetune. This is a full on editing app that can bascially do anything from stretching or thining out objects to defocusing the backgrounds. But the main thing I use this for is 'whitening' the backgrounds of my photos. The only other features I use is the defocusing or smoothing tool to get rid of any graininess a photo can have due to lack of quality.
Pro tip: When you search up Facetune in your app download store two will pop up. Facetune and Facetune 2. I have both, because originally there was just Facetune and it costed money. Then within the past little while they introduced Facetune 2, which is free (with in-app purchases), but the three tools I talked about are completely free to use in Facetune 2!
So let's get into the how-to tutorial now.

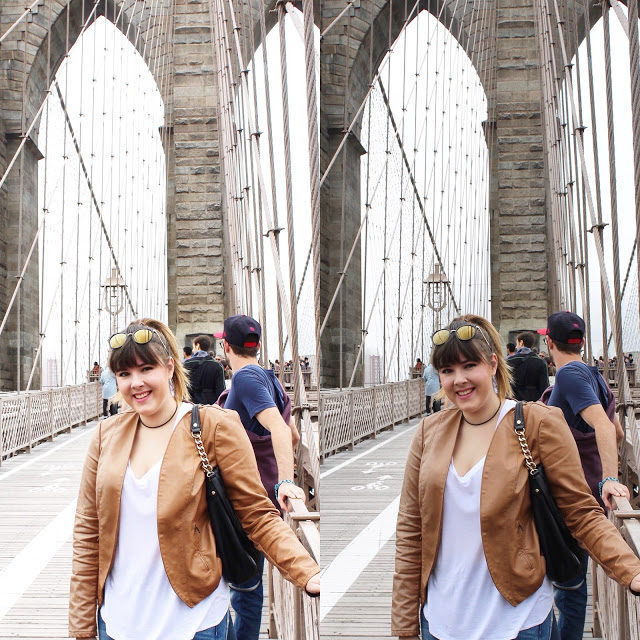
Step 1: I bring the original photo into Facetune 2. If the photo wasn't straight when taken I use the iPhone 'Photos' editing feature to straighten the photo before bringing it into Facetune. In this case it was good!
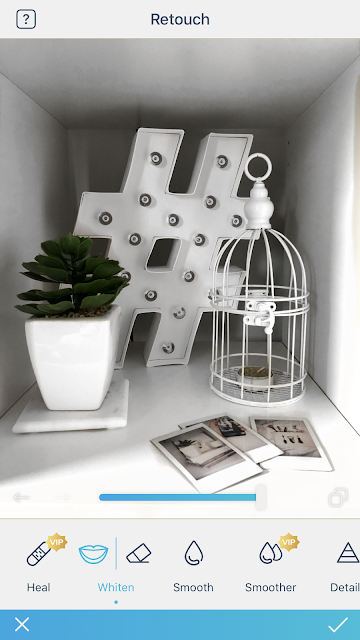
Step 2: I use the 'Whiten' feature to whiten any white spots and the background.
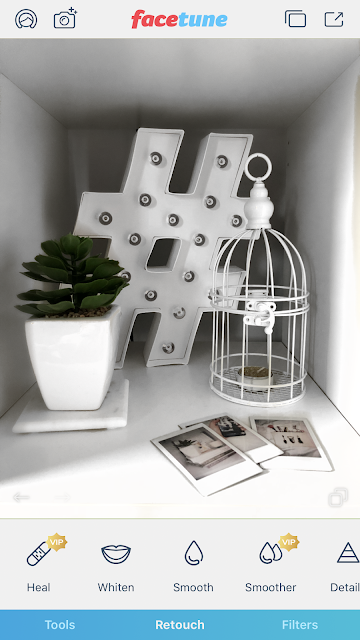
Step 2: I use the Smooth tool to smooth out any spots that look grainy. And save the photo.
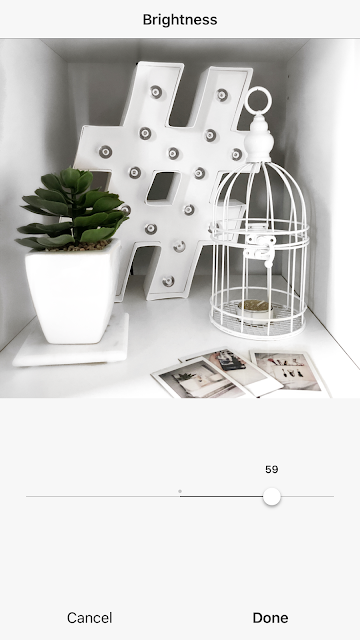
Step 3: I bring the saved photo into Instagram and use the built-in editing tools. I always brighten the photo.
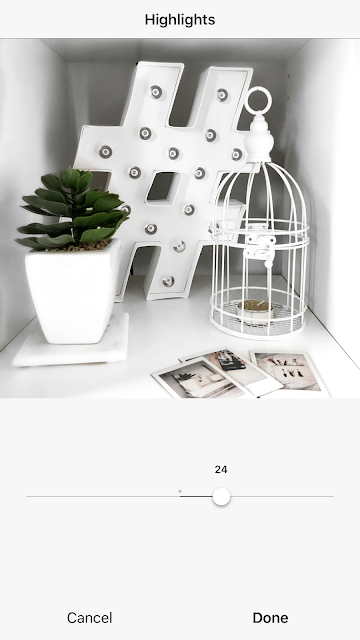
Step 4: After brightening, I play around with highlights, contrast, sharpen, and shadows until I'm satisfied with the look of the photo,

Step 5: In this case I wanted to brighten the photo even more so I boosted the brightness. And then your done and ready to post!

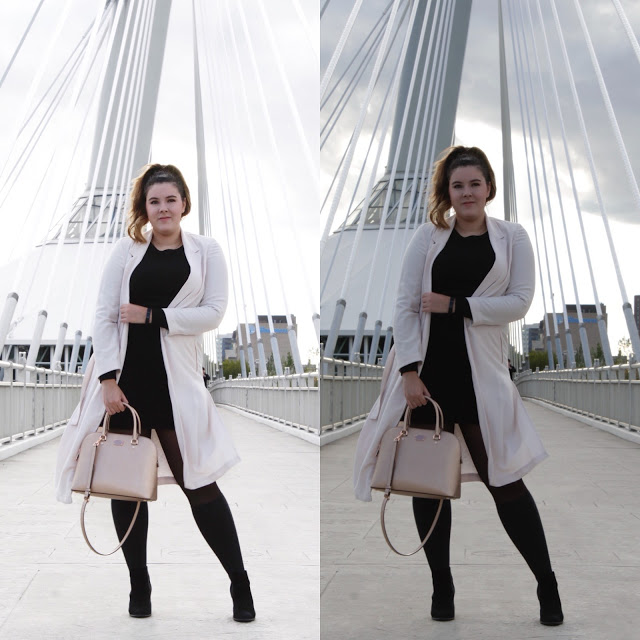
And here's the final edit*!
Another pro tip! If you want to edit a photo that was taken in harsh yellow lighting and it looks to warm tone, then use the Temperature tool in Instagram and add more cool tones to balance it out.
I know it's quite a few steps to edit a photo, but I love creating a beautiful streamlined feed for inspiration.
See a few of my favourite editing transformations below:


For those who voted yes to wanting to see this post I hope it helped! Also please comment below with any other blogging or social media-type posts you'd like to see, I'd love to start doing more of these type of blogs.
*The tutorial isn't exact to the final image. This is just purely a recreation.